Thursday, November 20, 2014

West coast


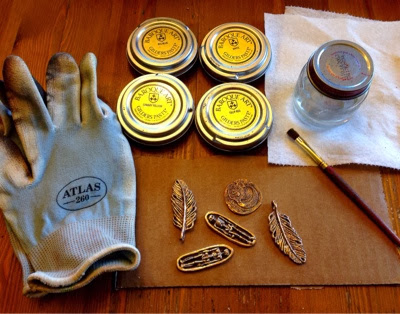
Hey there!  I just returned from a fantastic trip out west for a couple of shows. The first was Designer Con in Pasadena, a show focusing on artist prints, sculptural toys and apparel. It was a lot of fun to showcase our goods to a new crowd and meet loads of artists. The mermaids I carved and cast received a lot of attention, but it was my paper dolls that were a hit. I think I'll do it again, maybe. Doing shows is out of my comfort zone. After the show, Jess and I drove up the coast to meet some friends at The Sycamore Spa in San Luis Obispo to enjoy the hot springs. We got a room with a tub and pretty much stayed in the water the whole time. I think that water is magical, since I went in with a variety of aches and pains and came out feeling like a kid. I wish I had that water in house.

Whenever I'm in SF, Jess takes me all over the city to sample the local food. This is my favorite part. The food is so good, every time I think about it I have to take a moment to relish the memory. Anyway, here's a picture of some amazing doughnuts from Johnny's. They were so delicious, it was hard to stop at one. I mean two.


The Conservatory of Flowers was having an exhibit of aquascapes ( which were really hard to photograph!) but it was the collection of carnivorous plants that amazed me. Not only was the collection varied, but many were huge! I couldn't believe the size of some of those pods! The ones in the picture are easily bigger than my face, which impressed me because I couldn't grow them larger than a few inches. Anyway, it was marvelous. 
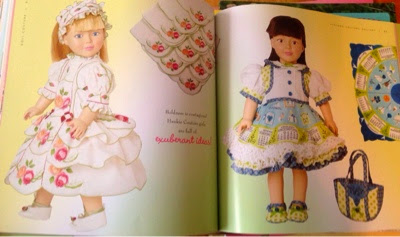
Between jaunts around town, I worked on some projects for Jess's pop up store in the Mission that will be opening near the first of December and will stay open till the end of January. The store, Elton Jeremiah, will feature vintage finds, handcrafted jewelry and also hand painted vintage bags. They were so fun to paint, I've been looking around for a bag maker to make me some blanks.
I'll post more info on the opening as it gets closer. 


Friday, November 14, 2014

Friday, September 12, 2014

Tiny dress


Here's the dress I made from one of the patterns in Hankie Couture. I altered the bodice, so I could add beaded straps (which I will do when I have a spare moment). I didn't make the doll, but purchased her from an artist on ebay- neverland43. She reminds me of a borrower!


Let's make some doll clothes!


Hi! Today's craft obsession ( because I always have one!) is making doll clothes. Azalea and I love dolls and have, well, a mess of them, in a staggering array of sizes and brands. We're trying to curb the addiction, but only a little. Anyway, we added the new book Doll Couture by Marsha Greenberg to our craft book collection. Let's take a look.
The first thing I noticed about this book was the variety of outfits and the unique use of vintage handkerchiefs. 
I like the use of doilies as well. Of course, if you don't have a stash of hankies, you could use quilting fabric. The dresses are built from simple shapes and adorned with trims and bias tape, ribbon flowers and tiny buttons.
I had the idea of altering the patterns to fit my ball jointed dolls, since the pattern shapes seem simple enough to just reduce. This book has a lot more patterns then the authors previous book, Hankie Couture. That one has a few base patterns, very simple to trace onto paper towels to get started. It's for Barbie sized dolls, but these are easy to alter to fit other dolls ( I made a variation to fit my dollhouse sized doll).
While both books utilize interesting fabrics and have some good tips for tiny sewing, Hankie Couture has much easier items to finish. 
I was impressed with how many variations the author could get out of a couple of base patterns. Also, the finishing in both books is very nice, I love it when doll clothes are made beautifully. We enjoyed getting inspiration from both books and recommend them for an afternoon of sewing happiness. 
Here's where to get a copy:
http://www.runningpress.com/book/paperback/doll-couture/9780762453726

Sunday, September 07, 2014

Small items


Hi! Here's a little sculpture I made out of polymer clay, to be cast in resin. I think I'll try to get an ivory or porcelain looking resin, so it has an antique quality. I haven't decided if I should add more details to the head, like a crown or head dress. Anyway, it was fun to carve.
This cute little dragon-eyed goldfish will become a pin in resin, I think. Although greg thinks it would look better in pewter. I'm hoping to have a bunch of new, small items to sell at Designer Con, this November in Pasadena. I will be sharing a booth with Jeremiah Ketner and his lovely paintings. I can't wait to go! 

Wednesday, August 20, 2014

Bead Fest PA!

Hey there! We have been working round the clock to make nice things for the upcoming Bead Fest! Here's the site: http://www.beadfest.com/philadelphia.aspx
The coins are made from sterling and have a lovely rainbow finish, due to some hi jinks with liver of sulphur. This design is new and will debut at the show.
Another batch of crystals! I love how these look, like pieces from a movie, maybe Dark Crystal or Legend. Anyway, I'm staying up all night making more goodies for the show, so stop by early to see everything!

Thursday, August 14, 2014

Hi! Here are some new hand painted pins cast in cold porcelain ( resin infused with porcelain). I spent some time on this batch, having fun with pattern and color. I even coated their tiny eyes with clear resin so they'd look like glass. I'll post some to my shop, but most will go to Bead Fest, PA next week.
Look at Buttercup! So cute. She reminds me of Frick, except nicer, cleaner and less emotional. 
Greg has a surprisingly green thumb! When he said he wanted to grow  tomatoes, I said ok, but I've killed every kind of plant, no matter how much I love it. I picked this handful for a salad and couldn't believe how much better the flavor was.
I found these in the yard, but have no intention of eating them. I love the look of them, the surprising colors, the plump shapes - but not enough to risk puking my head off, or death. I've heard too many stories of the expert mushroom hunter who killed several folks after mistaking a Destroying Angel for a common edible fungus. No thanks. The only wild mushrooms I'll eat are from the store and easily recognizable. I don't like the really weird ones anyway. It's a textural thing. 

Anyway, I've turned into a hermit, only leaving the house/yard if I have to. I haven't gone anywhere all summer, which is unusual for me, since I like to visit friends and family while the kids are home for break. Not this time. I've been absorbed in my studio, attempting to organize areas and have three places left to sort out: felting station, dollhouse area and resin pouring station. The biggest problem is that I have so much stuff with so little storage. Whoever built this house hated the idea of storage, because the closets are all tiny and hard to organize. Anyway, I wish Andrew would come back and help me rearrange again. It's so daunting. My fiber containers alone make me feel like taking a nap. Actually the biggest culprit is all the knick knacks and toys I've picked up over the years. I'm a kid, with a love of dolls and toys unmatched by anyone I know - including my kids. Oh well. It's not at hoarding levels, so it's ok. Every one is different!

So, I've been making all kinds of things for Bead Fest, so check back next week to see what else I get into.

Thursday, July 10, 2014

Thoughts on Symbolism


Over the years I've been asked what certain pendants 'mean' or why I've decided on one symbol over another. Ever since I could remember, I've had a fascination with symbols, especially in art. It seemed to me that it was a secret language, or visual poetry. It wasn't so much that the image  had another meaning, but that meaning could be many things, depending on the viewer, on the artist, on the color - it was a riddle. I am still bewitched by the idea that a symbol can be as old as the world, yet still persist, altering and evolving as we do. Symbols of hands and eyes have been found in our earliest art, in cave paintings, formed from mud and scribed on vases. When I was a child I drew stars with eyes, after hearing a poem with the line 'the night has a thousand eyes, and the day but one'. The image stayed with me, so that I found myself trying to find the source of my favorite symbol. I found that the eye could mean so many things, like protection, or to keep away covetous glances, but mostly, it was to say 'Look! See!' and be watchful.  

So, regardless of any negative connotations a symbol may have picked up, I'm going to use it. Because, as an artist, I believe in the power of intention. There is something tangible in what one thinks about, or feels, while making art.  When I'm carving a piece, I think about the history of a symbol, of its roots, then think of what it will mean now and focus on that. Of course this idea has limitations. One can't change the meaning of a cross, or the swastika. But, symbols can be changed and they do all the time. It's what makes it so interesting.  One of my all time favorites, the harpy, had their image changed from lovely wind spirits, to ugly hags by the Romans. They probably originated from the Egyptian symbol, Ba, a person headed hawk that flew into the afterlife. Anyway, I adopted the image of the bird person into my visual language and use it all the time. I've written stories of bird girls finding lost things and returning them to their owners. I suggest not arguing bird girls, as I have one tattooed on my arm  and will get snappish.
Anyway, at the end of the day, a symbol can mean whatever you want it to. Here are a few of my favorites, some that I made, others from friends. The little horned statue is completely made up, but I like to think of her as forest guide -  same thing with the antler creature that is sometimes called Cernunos, or Lord of the Hunt. The silver eye bead is from Anne Choi, my favorite artist of all ( plus her eye beads are the best!). The little arrow was a gift from my buddies at Cabela metals ( to hit my goals). The tiny bronze bird girl is special. Only me and Wiesel have bronze ones. The eye pendant is very special to me. I was wearing it on one of my  best days - the day that my long lost brother contacted us after 23 years AND I found out I won an amazing ball jointed doll in a contest! So, I consider it a lucky charm.

Monday, June 16, 2014

Treasures from Bead and Button 2014

Hey there! 
What a great show! This year was an action packed event, seeing old friends, making new ones, tormenting my brothers (yep, both my bros were in attendance - along with Greg and Bob Burkett) and also fantastic shopping. I mean, it's why I go! To make money, of course, but acquiring treasure is one of my hobbies. So, here are a few highlights, starting with the work of the inimitable Anne Choi. The first cylinder bead features Elizabethan insect designs, the elephant says 'for luck', as does the fish. The text bead says 'love must be as much a light as it is a flame' and the cloud bead has various weather designs on each side. I love her beads most of all. You can look at her work at www.annechoi.com

These stone goodies come from a variety of vendors.  I definetly have a palette this time!
The lovely glass beads are from my neighbor at the show, Wendy Bergamin. I love how jewel like they are! 

These juicy glass forms are from Maureen of Pumpkin Hill Beads. I like to stack them up on a glass tipped wire and make hairpins. They remind me of sea creatures.

Here are some beautiful eyes on wires that Maureen made. I'm not sure what I'll do with them, but I love the lifelike colors. So, those are some of my favorite vendors that I always shop from. 

Monday, May 12, 2014

New Designs for Bead and Button 2014!

Hey there! Here are some of the new designs that will debut at the Bead and Button Show in Milwaukee June 6-9. 
This wide pendant is still in progress, it needs to be cleaned up and polished a bit more. I was thinking it would be nice to have a really simple, clean lined butterfly that would look pretty with that sparkly gemstone chain. 
This piece was inspired by the book Daughter of Smoke and Bone by Laini Taylor. It's a beautifully written trilogy featuring angels and demons and a girl with blue hair. The original symbol ( Hamsa ) has a long history of use, with variations existing all over the globe. This piece isn't really part of the original symbol and looks a lot different, in my opinion. I made it as sort of a protection piece. Anyway, I carved this piece imagining it strung with mixed materials, wire work and hand carved stones, maybe as an amulet necklace, or part of charm tassel to attach to a purse strap.
Can you tell I was still listening to those books? More on the protection eye theme, this time with a bit of open work. I pictured faceted stones wire worked with leather, or if cast in bronze, turquoise and carnelian for an Egyptian flavor. I can't wait to add some danglies to this pendant! I bet Andrew would put this on a leather cuff, with some rivets, or stitch work.
This little bee is going to look good in pewter! Better in bronze, but then, what doesn't? I can picture this on charm bracelet, or simply strung on a cord. Sometimes simple is nice.
This little plumpy baby is a pearlscale goldfish, like my beloved Popo. I'll probably only sell one ( to a diehard goldfish fanatic like myself ) but I don't care. I make whatever I want, which is why our site is chockfull of weird things like bumble friends and mer sprites. Oh well. Stay tuned for more goldfish, because I've been staring at my baby goldies with soft eyes. So you know that means I have to carve a telescope, a ryukin, an oranda and celestial eye! I know, so perfect for a charm bracelet! For my bracelet, I'll paint them with enamel paint to look like my fish. It WILL be cute. 

Anyway, the month before the show is always chaos, nobody is getting enough sleep, time seems to speed up and I run around in questionable fashion choices ( sweatshirts and Thai fisherman pants? Aprons worn 24/7? Why not! ). 'These are good times' I say to Azalea, as I convince her that polishing bronze coins at the dinner table is good fun. It is actually fun, we push ourselves till we have crazy eyes, but that's when good, no, awesome ideas happen! Then, we have the rest of the summer to create all the wackiness that we dreamed up before B&B. I look forward to the day we leave, because it means I can sleep for like ten hours in the back seat and wake up and see all my buddies. I only have 23 days to go. 

Wednesday, April 09, 2014

Frick!

Boy, did I love this cat! I painted his portrait, carried little tiny Polaroids of his face and stared lovingly into his eyes everyday. Folks would be like 'damn, you are obsessed with that cat!' and I would be like 'isn't everyone?'. Anyway, the picture is easily 15 years old, back when I used to make him fanciful collars (which he loved to wear - he would get really mad when our other cat Paddy would try and fight them off him). I was thinking  about his gorgeous face and wondered if it was time to get another cat......maybe I'll just wait awhile longer. He would be a hard act to follow.

Friday, February 28, 2014

Gilders Paste Patina

Hey there! Here's a quick tutorial on how to apply a colorful patina on metal. 
Supplies:
•Gilders paste in your choice of colors ( I use four: tulip red, iris blue, white and canary yellow - from this palette you can get every color). I bought mine from Rio Grande on the website: www.riogrande.com
•Paint thinner
•Gloves, I use non slip fabric gardening gloves by Atlas
•Cheap paintbrush
•Paper towels
•Cardboard work surface 
•metal charms - I use this technique on my pewter and bronze beads and expect this to work on any metal.
First, get everything ready and work in a well lit, well ventilated area. Use a fan, since the paint thinner can give you a headache.
Dip the brush in the thinner and work into the paste cake, you don't want to soak the cake, just wet it enough to pick up some color. I use the lid as a palette to mix colors, wipe it off when the lid gets murky.
Apply the color over a clean metal charm, using the brush to scrub the patina into the recessed areas. Its easy to get lots of variations in the color, just dab a coordinating shade next to one already applied and blend. This part should be fast, don't agonize over it, get the patina on and move to the next one. 
I work in an assembly line, quickly brushing on the paste, keeping my brush somewhat clean by dipping it into thinner and wiping it on a paper towel. 
The colors shift between pieces, because I'm wetting the brush in thinner and picking up a little paste, mostly mixing on the piece itself. This method will give lots of variations, if you want pieces to match, premix a dollop of color on the lid.
Wait 5-10 minutes, then use a paper towel to remove the excess color. If it's still a bit damp, more will come off, giving a more subtle look. The drier it is, the harder it is to remove, although the high points of the design will polish readily. 
I put on gloves while handling the pieces, because I don't like my fingers to get stained. Plus, it helps grip little charms.
I let the finished pieces dry completely and give them a light polish. The wax in the patina shines up nicely! I used to coat the pieces in Renaissance Wax to seal the surface, but found that it was an unnecessary step, since there is wax in the patina. I started using this technique after years of fiddling around with various recipes of patina and having some items continue to erode. This method doesn't alter the metal itself, just adds a tough layer in the recessed areas. If a solid color is desired, try metal inks, although both methods will wear off with time and use. The subtle coloring in the design sets off the metal itself, adding another dimension to the piece.